Showing posts with label DIY. Show all posts

Thursday, July 17, 2025

Comic Con 2025

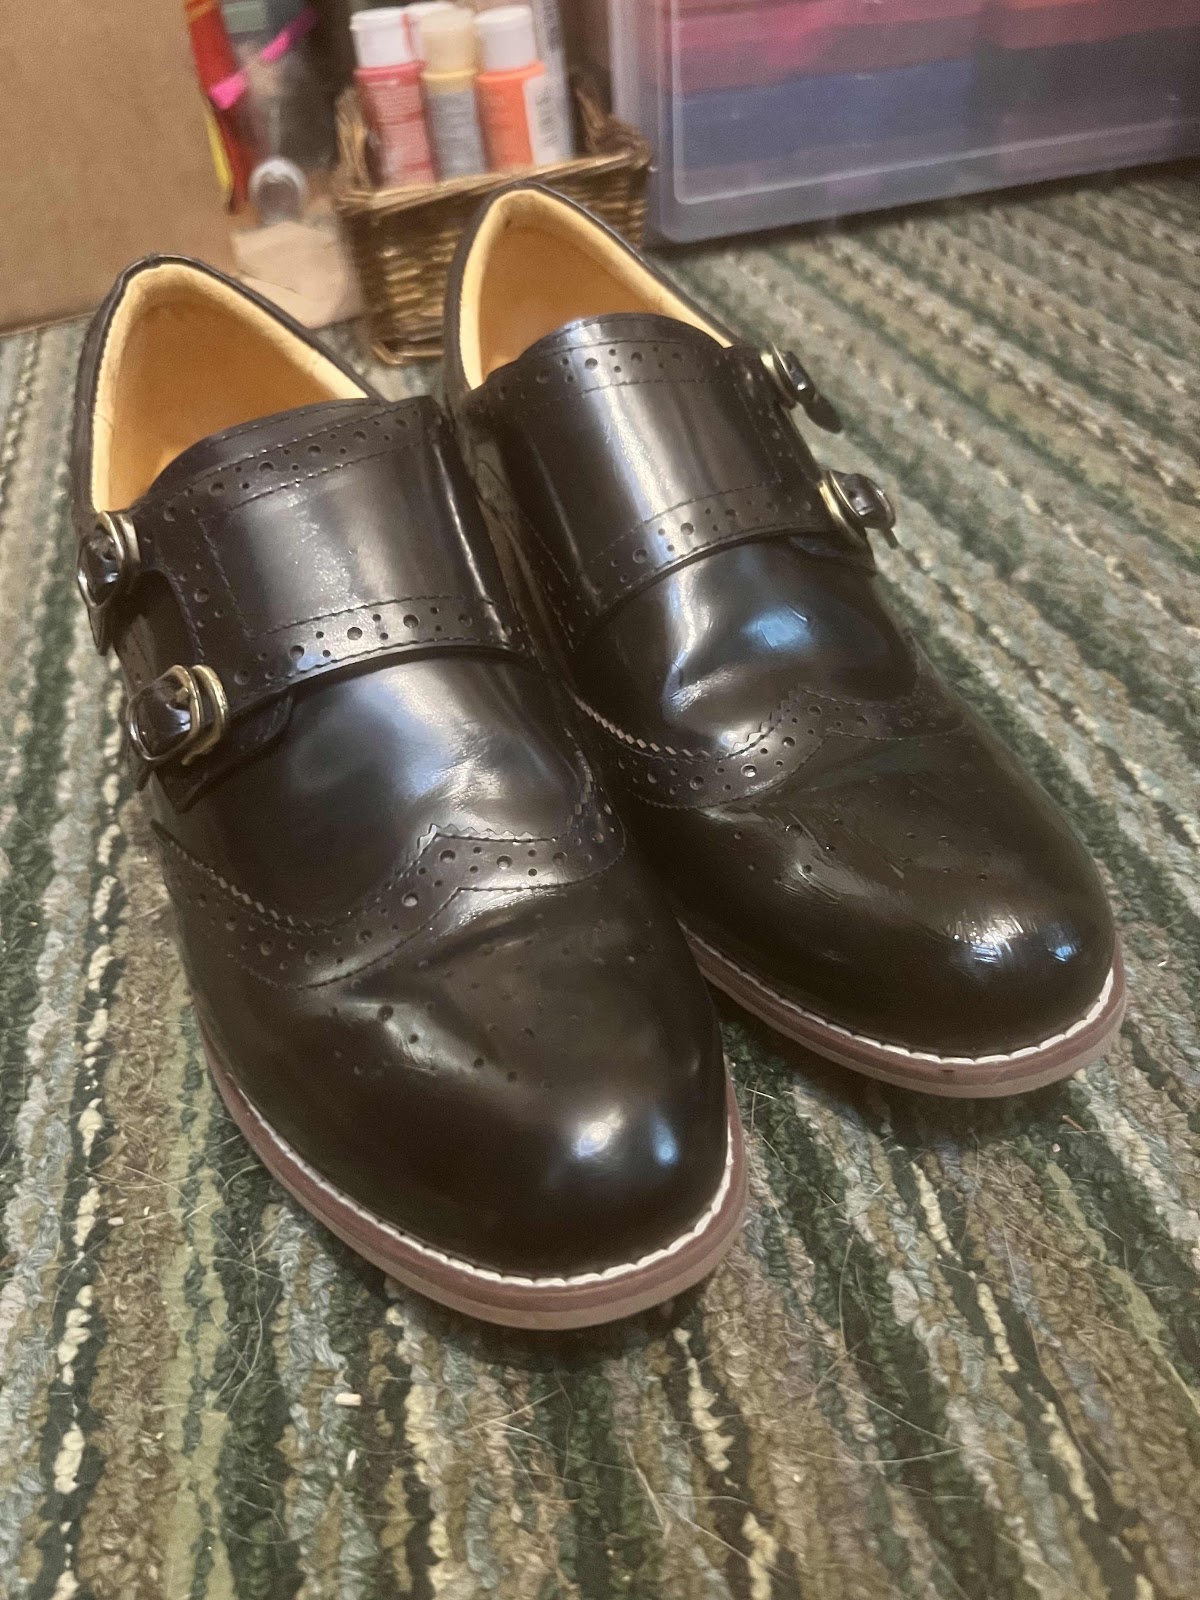
I finished my Agatha Harkness costume for Comic Con. It is the outfit she wears when she is gathering a coven. I found similar shoes, but they were navy. A little black dye fixed that.


Then I had to make over a striped blouse to look like the one she wears. 


First I cut off the cuffs and then cut the front higher. Then I  used tea and painted it on with a paintbrush. I had the perfect buttons in my button jar (given to me by my grandmother). I have a hat, sunglasses and a pair of jeans I cropped a bit shorter. 
I will make sure to get pictures at Comic Con!
Peldyn

Tuesday, March 25, 2025

Mending Things

I had found a super cute skirt on eBay that was the exact skirt in a board from Pinterest. 


I bid on it and won. The seller then messaged me to let me know that she found a couple holes and did I want to cancel. I said no, because I had plans… bwahahaha!

This is the skirt after I embroidered over the holes. So cute!


Would you have cancelled the purchase? 
I am trying to make do and repair so this was a way for me to keep something out of the landfill.
This is one outfit I have planned so far


What do you think? 
Peldyn

Monday, July 18, 2016

Arm Party


Vintage Avon charm bracelets and a homemade beaded bracelet.

 DIY and yard sales can have you on your way to party time in no time for very little cost. 
Peldyn

Thursday, January 14, 2016

Unpot Your Makeup: Final Installment

Here is a little video I did about the makeup unpotting. I might in the future do a how-to on making your own palettes. 
https://youtu.be/h5hcRY_vGEU

Have a crafty day!
Peldyn

Thursday, August 27, 2015

Table on a Shoestring


I am all about doing stuff on the cheap. Take this table I just repainted. 

It started out as my old, scratched, heat marred, water ringed, dining room table that I had bought at Pier 1 years ago on close out for only $79.00. Over the years kids and grandkids had left their damage.
My original plan had been to strip it and then restain. A few months looking through Pinterest changed my mind.  
First off I had all these cans of Oops! Paint that I had bought at Home Depot and Lowes on clearance.

I had used some of them already on various little projects so they have almost paid for themselves. I also had a partial can of sealing wax from refinishing an old buffet I bought off an online yard sale site. Then I found a Moroccan stencil and I downloaded it from this site: http://7thhouseontheleft.com/2011/08/window/
I printed out 4 copies of the stencil and used fabric adhesive to hold them in place while I traced around them with a sharpie. 

I tried to keep about 1/2 inch space between each motif. I just eyeballed it. After the whole table was drawn out in sharpie I went in and started painting. I used one colour at a time and tried to be random. I didn't over saturate each space with the paint as I wanted the brush strokes to show. I was going for a very earthy, organic look. I also let a bit of the black of the sharpie peek out. It helped make each motif "pop". A coat of the sealing wax and it is done.

Now if I could just finish the rest of my kitchen...

Peldyn


Tuesday, March 31, 2015

Unpotted Makeup Progress Report

As you can see, I have a good amount of eyeshadow unpotted and put into my blank palette. I actually made this palette as I could not find any large ones in stock on etsy. I bought a 12x24 inch magnetic sheet from Amazon for about 8 bucks. I had an extra foam board I used to make the rim of the "well" and the base is scrap cardboard and fabric. I think I should be able to fit all my eyeshadows in this. I will need another for cheek/lips. Not a bad effort though I might try washi tape to cover the next one. I highly recommend trying this if you are the slightest bit crafty.
Cheers!
Peldyn

Thursday, June 5, 2014

Of Linen, String and Yo Yos.

Embellishing a skirt. Sometimes it is the little things that makes me happy.

Wednesday, May 12, 2010

A Dress To Dye For

Friday Finds April 30th 025
I am sure you remember the gold and orange silk dress I bought from the thrift store that I said I was going to try and dye. Well, I actually did it and finally got the pictures taken for you all to see.

Green Dress 028
  • Belt-Forever 21 $9.99
  • Necklace- Made by me from clearance bits from Joanns and chain from a seller on etsy.com total price $3.00
  • Shoes- Target, on sale a while back for $19.99

Now it is totally fab in green! I used a bottle of denim blue Rit dye that I had bought years ago for around $2.75. So add that to the original investment of $2.00 and my little dress cost me a whopping $4.75! An amazing bargain for a silk dress that looks to be custom made. Yes, I could have made a total mess of this, but for $2.00 I figured, what the heck? I just went for it! Now if you want to do it right Dharma Trading Co. carries silk dyes that can be safely used on delicate fabric and they have a wonderful website and great customer service. Me, I am a wing it kind of girl, but you don't have to be. So I hope next time you go thrifting you see possibilities you didn't see before!

Pel

Sunday, March 28, 2010

Sweater Girls

There is something about a girl in a sweater that is ineffably sexy and demure at the same time. My grandmother (known to me as Nana) Lillian Callender was a young woman at the height of the "sweater girl" era. She was so adorable.


I would give anything to have her poise and beauty. She never lost it. I would also kill for that sweater she is wearing! She told me once that it was a lovely light peach colour. I am sure it looked fantastic with her hair. She would dye her blonde hair a rich auburn colour that went with her blue eyes so beautifully.

Sweater Girl
  • Cashmere Sweater- Goodwill, Victorville
  • Skirt- Max Azria Outlet, remix
  • Tights- Anthropologie, remix
  • Shoes- Not Rated via amazon.com
  • Necklace- Made by me from beads from Joann's

I tried to capture the spirit of what my Nana would have worn in this outfit. It was also a chance to wear my new sweater that I got at Goodwill for a mere pittance. Only $5.99 for cashmere! The necklace was also a bargain. I made it from about 5 packages of pearl beads that were on sale for 89 cents. Sweet deal!

While I miss my Nana, I still have her pictures to look at and I still hear her voice in my head. She is an inspiration to me.

Pel

Monday, March 15, 2010

Bursting Bubbles

Bursting Bubbles 1
Bursting Bubbles 2
Bursting Bubbles 3
Bursting Bubbles 4

I had this bubble dress I bought a while back that I had only worn a couple times. Now that I am sick of bubble dresses I decided to turn it into a regular dress. It was not hard. I just cut it at the point where the dress's skirt and lining were sewn together. I then took all the gathering stitches out of the hem of the dress and pressed it flat. I serged it for a neat finish and turned it under once to hem. Now it is a regular dress! I wore it today with the sweater I got at Goodwill for a cute retro look.
Pel

Thursday, March 11, 2010

DIY: Everything's Coming Up Rosettes!

I have been seeing rosettes everywhere so I figured instead of buying them, the shoestring way of doing things would be to make them myself! So here is a little walk through of how I did it.

20100310_14
First I picked out a few ribbons and buttons. You can choose what colors you like. I went with coral and red, but later on I plan on doing more in many different colors!


20100310_18
Cut your ribbons from 5 to 7 inches depending upon the ribbon thickness and how big your button is. The coral ribbon is 7 inches and the cherry red is 6. I plan on doing some that are smaller. Make a loop with the ribbon overlapping the ends about 1/4 of an inch. Pinch in the middle and using a needle threaded with matching thread, run a stitch through the center.

20100310_20
Do the same with the other ribbons stacking on top. Use three to four ribbons per rosette. It is up to you.

20100310_21
Center button in the middle and stitch in place.


20100310_22
For the coral rosette I then sewed a pinback in place.


20100310_28
For the cherry rosette I sewed a bobby pin and then used E-6000 to further hold it in place.


You can use your rosettes to decorate so many things!

20100310_39
Hats


20100310_30
Shoes

20100310_33
Hair

20100310_26
Your clothes!


This was so much fun I plan on teaching my granddaughter how to do it. This will make a great weekend project for us.

Pel

Monday, August 10, 2009

Anatomy of a Skirt Pt. 1

As promised I am going to walk you through the process of sewing a skirt. Of course the first thing to do is settle on a pattern.


Anatomy of a Skirt 016Originally uploaded by Peldyn


I chose this close fitting style with a deep ruffle that was higher in the front than the back. I took my measurements and decided that I was in between a size 8 and a 10. After reading the pattern it said the the garment was designed with 4 inches of garment ease. That is a lot of ease! I don't like my garments loose so I had to think how to go about this. Since I have chosen a lovely black and white cotton plaid I thought it would look better if it was on the bias. Being on the bias would give the garment more "wearing ease" so I could cut it closer to the body. Taking this into consideration I used the size 8 to cut the skirt out. You may notice from the pictures that I did not actually cut the pattern itself out as a size 8, it is merely folded under. I do this to give more options later on when cutting a different garment. I took pinches in at the hem to narrow the skirt both at the front and back as I wished it to be tighter at the knee.


Anatomy of a Skirt 013Originally uploaded by Peldyn


The ruffle had to have pinches taken in also so it would fit the narrower silhouette. I shortened the skirt by 2 inches as well. These alterations were all done using pins on the pattern.


Anatomy of a Skirt 014Originally uploaded by Peldyn


Ignoring the directions, I unfolded my fabric completely and took one corner and pulled it to the other edge creating a triangle.


Anatomy of a Skirt 005Originally uploaded by Peldyn


I laid the skirt front and back out on the fold. I took care to make sure that the pattern would match by cutting out the skirt front first and then laying it on top of the skirt back and shifting the pattern up and down until the pattern was just right. I then took off the skirt front, pinned the skirt back down and cut it out.


Anatomy of a Skirt 006Originally uploaded by Peldyn


I refolded the fabric again and cut the ruffle and waistband. Because I changed how the skirt is placed on the grain I used a lot less fabric then the pattern called for, only a yard!


Anatomy of a Skirt 007Originally uploaded by Peldyn


Anatomy of a Skirt 010
Originally uploaded by Peldyn


I cut a cute little head scarf for myself out of the scraps! Now I marked the darts with dressmaker's chalk and am ready to sew!


Anatomy of a Skirt 017Originally uploaded by Peldyn


Now what about that left over fabric? I am going to be giving it away! One reader who leaves a comment over the the length of this series will win 2 yards of black and white cotton plaid to make their own skirt with! All you have to do is comment on one of the articles to enter. I will pick a name at random and announce the winner when the series is done.

***Wednesday, Starting to Sew!***
Related Posts with Thumbnails